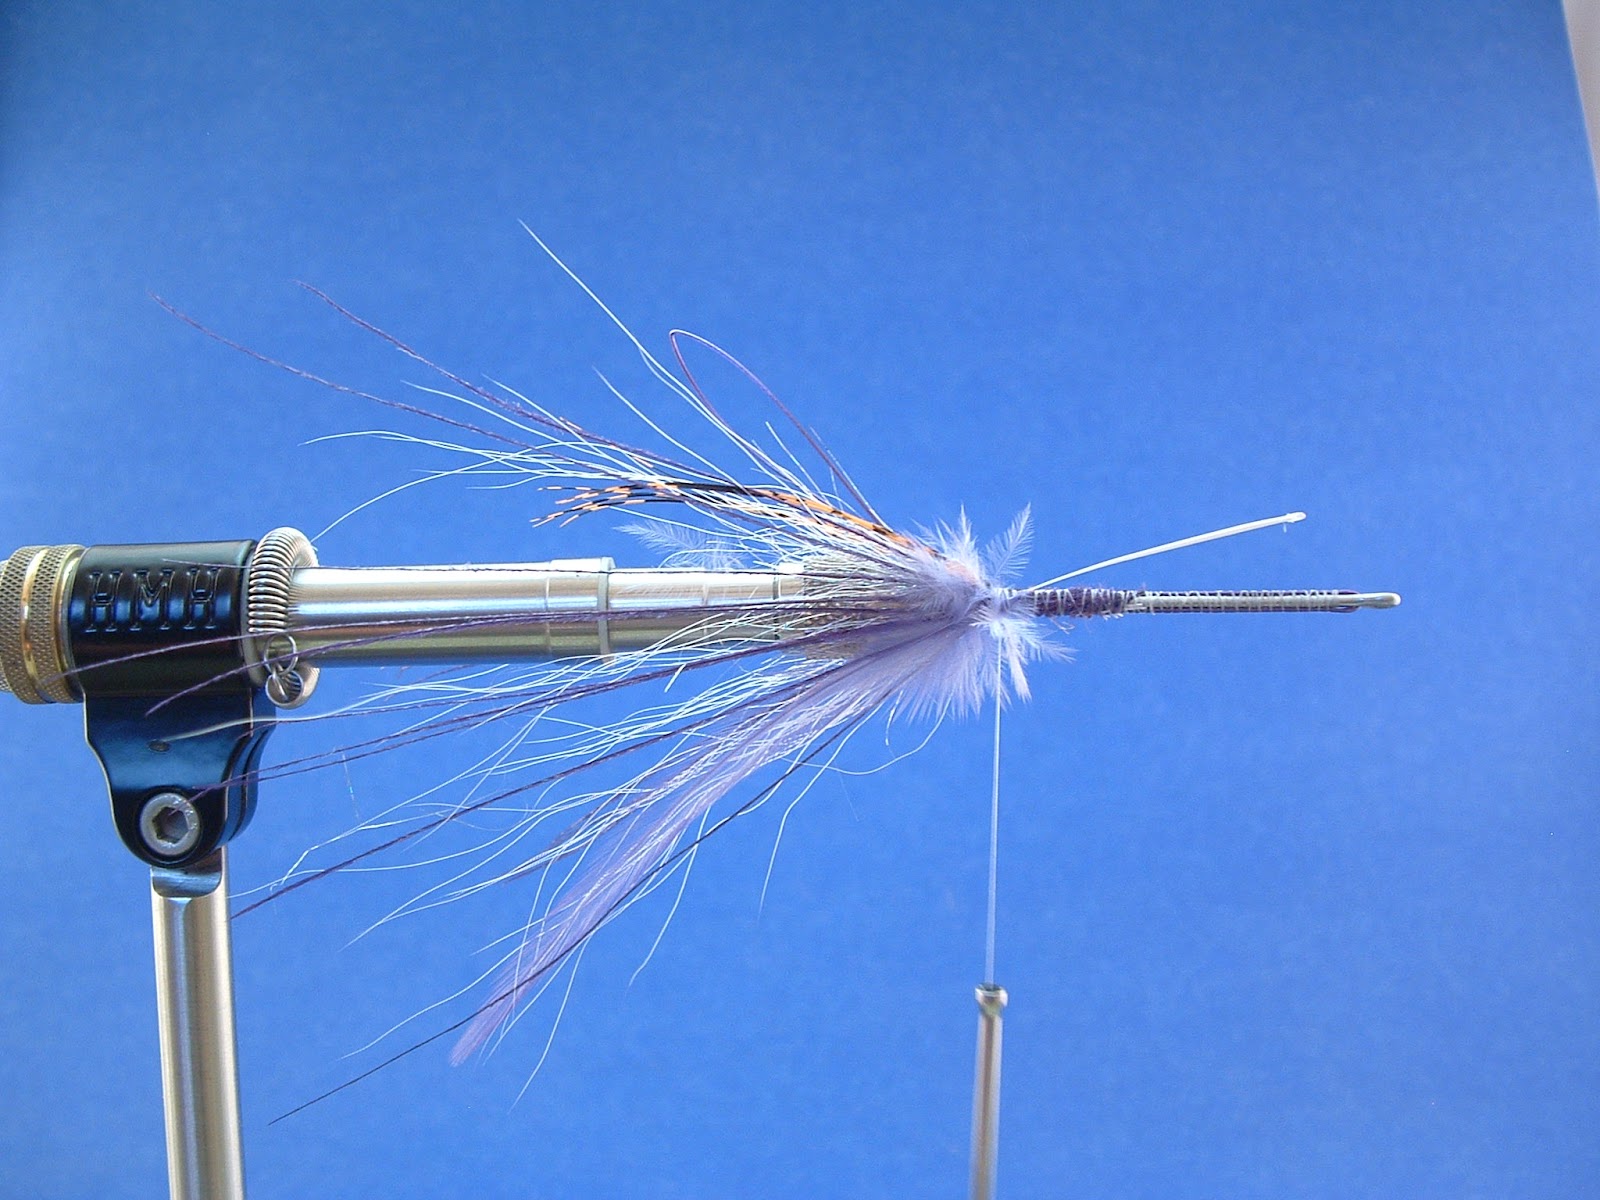
Here are some flies that I am trading with a friend from the west that I met through the internet. He suggested we trade a few flies and so that's what we are doing. I have already received his flies and I like them very much. I plan on fishing two of the them and will keep the blind eye in a special place.
There were two patterns I felt like tying and I decided to "freestyle" two others. The latter are based patterns that already exist so they aren't really true "freestyle" flies in my opinion.
Classic styles and modern infusions of special flies to swing for steelhead in the Great Lakes tributaries and around the world.
Friday, June 15, 2012
Thursday, May 17, 2012
Spey Nation V - Wheatley Box
It's getting closer.......can you feel it? It's like working your way down a sweet run with a good friend and you know one of you is going to hookup any minute!! That's how I feel about Spey Nation and I am looking forward to this year's gathering since I wasn't able to make it last year.
Every year, other than the fly swap for the first year, I have been donating a Wheatley box with plenty of flies to entice our favorite Salmon River species. This year there is 80 flies in the box at this point and I plan on adding a few more as the time gets closer to this great event.
Tuesday, April 24, 2012
How I Started Spey Fishing for Salmon River Steelhead
I'm really not sure why I got into spey fishing for Steelhead other than it seemed like it would be an interesting challenge and another method to add to my set of fishing skills. The first time I saw a spey rod being used was at the Sportsman's Hole in 1993. My next trip to Salmon River didn't happen again until September 1999 and the "spey rod" wasn't on my mind. I had forgot about it.
Eggs, nymphs, comets, splitshot, and "hooking up" were at the top of the list. I landed my first Salmon River Chinook Salmon and Salmon River Steelhead during that trip in 1999. It was all downhill after that. I was hungry for any information that was Salmon and Steelhead related. Especially the various types of flies that were used on the West Coast and East Coast.
I had found a half off, tattered copy of Trey Combs book, "Steelhead Fly Fishing" in a local outdoor store and bought it immediately. The "Spey Rod" popped back into my mind while reading that book, and all of the flies had me wondering if "swinging flies" would work on the Salmon River. Little did I know, it was already working for a small but growing group.
I had never tied on a "spey style" hook nor had I ever used some of the materials. Tracking down the items I was looking for was half the fun and I was meeting a lot of new people and making new friends. The history behind the flies and how they were fished were also very interesting and kept my gears turning for anything "spey" related. Athough most of what I read was about Atlantic Salmon, it was working for the West Coast steelheaders so it had to work in the Great Lakes right?
I purchased my first spey rod in 2004 and began practicing with it locally, and even took a summer trip to the Salmon River for more practice and to learn the river better. When the fall season rolled around I didn't have the confidence to jump straight in with the spey rod, so I stuck with my single hand rod so I could either nymph or swing flies. The high water at the time was an influence on my rod choice as well.
During one of our outings, after landing a few fish in the morning, I took the splitshot off my line, put on a new leader, then tied on a conehead Zonker style fly and started "swinging." It didn't take long and I remember that first hard tug like yesterday. The rest of the trip I stuck with swinging various streamers all day. I didn't catch as many as the rest of the group, but I was captivated with the technique and wanted more "tugs."
The following summer (July 2006) I took a trip back to the Salmon River to continue practicing spey casting and to continue to learn the river better. I was sticking with mono leaders and un-weighted flies, not really worried about catching anything. One evening I decided to put on an orange Moose Turd and skate it on the surface. What the heck, it was fun watching the little fish take pot shots at the fly. I guess it was the right place, right time, and right fly because one of those little fish turned out to be a nice 26"-27" Steelhead. I was walking on water. My first Steelhead on a spey rod was also the first Steelhead I ever hooked or landed on a topwater fly!! I guess you could say that experience sealed the deal, because after that I have been doing nothing other than swinging flies with a spey rod for Steelhead in the Salmon River.
October 2007 was when I began sticking with the spey rod to target steelhead in the Salmon River. As stated before, I had success with a mono leader and a conehead with a single hand rod, so that is where I started with the spey rod. It didn't cast all that pretty and definitely hinged quite a bit, but it worked and I was happy. It was even working during the last week of November into December when the water temp was in the 30's. My confidence was definitely built up at this point and I was looking forward to next season.
In the winter duldrums I started to play around with tube flies and figure out what I wanted to tie on them. I had also become very interested in tying married wing flies such as the classic salmon flies that were used for Atlantic Salmon. I had a full plate, or maybe a full vice would be more appropriate. It was nice to switch between tying a fly for show then tie a couple for the box. It was very frustrating at times when it came to the show flies, but I noticed my thread management was getting much better on working flies. The tube flies were improving as well. I had a crayfish pattern that I couldn't wait to swing.
The 2008 season was a great time. I put the conehead flies away and stuck with various types of spey flies new and old, along with the tube flies. I also started to use lightweight polyleaders because I didn't want to fish deep and dredge the bottom. It was a bit different getting used to casting the polyleaders, but it wasn't long before I had some tugs on the tube flies and the spey flies. I was basically building upon positive experiences and learning how to control the speed of the swing so the fly wasn't moving at mach one.
It has been a great ride from then up till now and I hope it continues. It has been nice to meet more like minded people on the river. I'd list them all, but I'm pretty sure you guys and gals know who you are. I feel very privileged to share time on the water with all of you.
Spey Nation was also started during those years and it has been a tremendous success. More and more people have been giving spey rods and switch rods a try. I don't see it stopping any time soon, and that is good because it seems people are beginning to change the way they think about fishing the Salmon River. Not necessarily people switching to spey rods and switch rods, but their approach to targeting the various species without snagging or lining them.
Eggs, nymphs, comets, splitshot, and "hooking up" were at the top of the list. I landed my first Salmon River Chinook Salmon and Salmon River Steelhead during that trip in 1999. It was all downhill after that. I was hungry for any information that was Salmon and Steelhead related. Especially the various types of flies that were used on the West Coast and East Coast.
After a few years, fishing nymphs and eggs became a routine, almost monotonous, plus I was tired of fishing the river bottom. Plenty of people were catching alot more Steelhead than me (and they still do), but I needed a change. First it started with the flies. I was already familiar with Streamers, but Spey flies and Dee flies were styles that I became interested in since they challenged my tying ability. They looked very "fishy" to me as well.
I had never tied on a "spey style" hook nor had I ever used some of the materials. Tracking down the items I was looking for was half the fun and I was meeting a lot of new people and making new friends. The history behind the flies and how they were fished were also very interesting and kept my gears turning for anything "spey" related. Athough most of what I read was about Atlantic Salmon, it was working for the West Coast steelheaders so it had to work in the Great Lakes right?
I purchased my first spey rod in 2004 and began practicing with it locally, and even took a summer trip to the Salmon River for more practice and to learn the river better. When the fall season rolled around I didn't have the confidence to jump straight in with the spey rod, so I stuck with my single hand rod so I could either nymph or swing flies. The high water at the time was an influence on my rod choice as well.
During one of our outings, after landing a few fish in the morning, I took the splitshot off my line, put on a new leader, then tied on a conehead Zonker style fly and started "swinging." It didn't take long and I remember that first hard tug like yesterday. The rest of the trip I stuck with swinging various streamers all day. I didn't catch as many as the rest of the group, but I was captivated with the technique and wanted more "tugs."
The following summer (July 2006) I took a trip back to the Salmon River to continue practicing spey casting and to continue to learn the river better. I was sticking with mono leaders and un-weighted flies, not really worried about catching anything. One evening I decided to put on an orange Moose Turd and skate it on the surface. What the heck, it was fun watching the little fish take pot shots at the fly. I guess it was the right place, right time, and right fly because one of those little fish turned out to be a nice 26"-27" Steelhead. I was walking on water. My first Steelhead on a spey rod was also the first Steelhead I ever hooked or landed on a topwater fly!! I guess you could say that experience sealed the deal, because after that I have been doing nothing other than swinging flies with a spey rod for Steelhead in the Salmon River.
October 2007 was when I began sticking with the spey rod to target steelhead in the Salmon River. As stated before, I had success with a mono leader and a conehead with a single hand rod, so that is where I started with the spey rod. It didn't cast all that pretty and definitely hinged quite a bit, but it worked and I was happy. It was even working during the last week of November into December when the water temp was in the 30's. My confidence was definitely built up at this point and I was looking forward to next season.
In the winter duldrums I started to play around with tube flies and figure out what I wanted to tie on them. I had also become very interested in tying married wing flies such as the classic salmon flies that were used for Atlantic Salmon. I had a full plate, or maybe a full vice would be more appropriate. It was nice to switch between tying a fly for show then tie a couple for the box. It was very frustrating at times when it came to the show flies, but I noticed my thread management was getting much better on working flies. The tube flies were improving as well. I had a crayfish pattern that I couldn't wait to swing.
The 2008 season was a great time. I put the conehead flies away and stuck with various types of spey flies new and old, along with the tube flies. I also started to use lightweight polyleaders because I didn't want to fish deep and dredge the bottom. It was a bit different getting used to casting the polyleaders, but it wasn't long before I had some tugs on the tube flies and the spey flies. I was basically building upon positive experiences and learning how to control the speed of the swing so the fly wasn't moving at mach one.
It has been a great ride from then up till now and I hope it continues. It has been nice to meet more like minded people on the river. I'd list them all, but I'm pretty sure you guys and gals know who you are. I feel very privileged to share time on the water with all of you.
Spey Nation was also started during those years and it has been a tremendous success. More and more people have been giving spey rods and switch rods a try. I don't see it stopping any time soon, and that is good because it seems people are beginning to change the way they think about fishing the Salmon River. Not necessarily people switching to spey rods and switch rods, but their approach to targeting the various species without snagging or lining them.
Sunday, March 4, 2012
Flies for Spey Nation 2012
As many of you know, I've been donating a Wheatley Fly Box to Spey Nation to help raise money for the Fish Creek Atlantic Salmon Club. This will be the 4th year I've done this and I'm getting a head start on it.
A Wheatley 1632 has been ordered and here are some of the flies that will in that box. More to come in the next few weeks!!
Summer Berry Style
Shrimpy Crawdad Looking Bugs
Green Butt Skunk Style
Herl Head Marabou Minnows W/ an Amherst Tail
Sunday, February 26, 2012
Feenstra's Emulator
Hook: Dai Riki 700 size 4 - 4x long shank
Tail : Barred Marabou
Body: 1 or 2 Emu feathers wrapped forward followed by 1 Schlappen feather palmered through the Emu
Collar: 1 Mallard Flank feather (wood duck color) tied in by tip and wrapped in the opposite direction.
Flash: Copper Flashabou tied in on top of the body
Head: Nice solide clump of Australian Possum underfur and all. Push the tips over the eye of the hook so fur surrounds the shank and wrap the thread around the middle of the clump. Push the butt ends back, wrap in front of them, for the thread head and tie off.
Wednesday, January 4, 2012
April Storm - step by step
Two years ago I tied a few big flies for "Flies for Fins." They were on big cotter pins, tied with mobile hackles and feathers, and had tented feather tip spey wings front and back. I liked them at the time, but wanted to revisit them and do a little tinkering around.
I had the West Coast and Squid on the mind so I tried to use some of the things from the previous version and incorporate a few more materials to make the fly more dynamic and definitely more colorful. There is still a lot of movement and space within the fly even though it looks on the bulky side.
The rear part of the fly is like one of the stations for and Intruder, except I didn't spin any of the fibers in a dubbing loop. That can be done if the tyer prefers that look, but I wanted to keep the profile a little more streamlined.
All of the steps are not complicated, and most tyers shouldn't have a problem, but there is a bunch of steps. Please follow along and if you have any questions please send me a m
Materials
Shank: 2" Cotter pin
Hook Loop: Beading wire 20#
Beak/Mouth Area: Holographic Ice Dubbing
Feelers: Bucktail
Sides: Fine Peacock Herl fibers
Crown: Lady Amherst tail fibers
Tentacles: Saddle Hackles - alternate colors
Rear Body: Ice dubbing
Rear Body Hackle: Schlappen
Sides: Fine Peacock Herl fibers
Tentacles: Saddle Hackles - alternate colors
Mid Body Wing: Marabou
Crown: Lady Amherst tail fibers
Front Body: Ice dubbing
Front Body Hackle: Saddle Hackle
Wing: Pheasant Rump hackles - Two staggered and stacked
Weight: Medium or Large barbell
Step 1
Before inserting the cotter pin into the vise or tube fly vise, hold it in your hand and attach the thread. Cover the shank with thead so the two sides of the cotter pin stay together. Select a 6" piece of 20# beading wire and attach it to the top of the cotter pin shank. Insert the butt ends through the eye of the hook then double them back and wrap thread over them. Apply your favorite glue to the shank at this point.
Note: The vice is making the beading wire stick up. It will extend straight out the back when the fly is done.
Step 2
Make a dubbing loop about 3" long and apply some tacky wax to the thread forming the loop.
Step 3
Insert some holographic ice dubbing into the loop making sure that the fibers are sticking out at right angles to the thread.
Step 4
Spin the dubbing loop and make sure to pick out the fibers as you go so they don't get bound together.
Step 5
Wrap the spun dubbing loop around the shank a few times. Make sure to fold the fibers back out of the way as you wrap. Tie off the dubbing loop and go back over the dubbing a little bit to make sure it is secure.
Step 6
Select a small clump of white Bucktail fibers. Seperate the longer fibers from the shorter fibers and save the longer fibers. Attach one clump of fibers to the top of the shank and another clump to the bottom of the shank. After making a few light wraps of thread, use your thumbnail to spread the fibers evenly around the shank.
Step 7
Cut off about 10 fibers from a bleached and dyed peacock stick....pre-dyed herls will work just fine as well. Attach one clump to the near side and one clump to the far side.
Step 8
Snip off about 6-10 fibers from a Lady Amherst tail feather and attach them to the top of the shank.
Step 9
Pick out two different colored saddle hackles. Tie one feather to the near side angled down below the hook. Take a different color saddle hackle and tie it to the far side of the shank angling down as well.
Step 10
Trim off all of the excess material and make sure everything is bound tightly to the hook.
Step 11
Tie in a schlappen feather by butt of the stem, then spin some ice dubbing onto your thread. Wrap the dubbing forward to about the midpoint of the hook and stop.
Palmer the Schlappen hackle forward and tie off where the dubbing ends.
Step 12
Trim off the schlappen fibers on top of the hook shank.
Step 13
Cut off about 10 fibers from a bleached and dyed peacock stick....pre-dyed herls will work just fine as well. Attach one clump to the near side and one clump to the far side. The tips should not extend to the rear of the fly. Keep them about two inches short of the longest fibers.
Step 14
Top View
Step 15
Step 16
Top View
Step 17
Take a marabou blood plume and strip off the lower fluff so the top 1/2 to 3/4 remain on the stem. Tie the plume flat on top of the shank with the tips extending about an 1" past the butt end of the cotter pin. Take a few Lady Amherst fibers and tie them directly on top of the marabou plume. Let the tips extend slightly past the tips of marabou.
Step 18
Top view
Step 19
Spin some ice dubbing onto the thread and wrap forward to form the front half of the body.
Step 20
Palmer the hackle forward and tie off. Trim off all of the hackle on top of the shank.
Step 21
Take two Pheasant Rump Feathers and stagger them on top of each other. Tie them to the top of the shank so they sit flat over the body and extend just shy of the marabou wing.
Step 22
Finish the fly by adding 1 medium or 1 large barbell with figure 8 wraps and gathering wraps to mount them securely. Coat the head with head cement or epoxy.
I had the West Coast and Squid on the mind so I tried to use some of the things from the previous version and incorporate a few more materials to make the fly more dynamic and definitely more colorful. There is still a lot of movement and space within the fly even though it looks on the bulky side.
The rear part of the fly is like one of the stations for and Intruder, except I didn't spin any of the fibers in a dubbing loop. That can be done if the tyer prefers that look, but I wanted to keep the profile a little more streamlined.
All of the steps are not complicated, and most tyers shouldn't have a problem, but there is a bunch of steps. Please follow along and if you have any questions please send me a m
Materials
Shank: 2" Cotter pin
Hook Loop: Beading wire 20#
Beak/Mouth Area: Holographic Ice Dubbing
Feelers: Bucktail
Sides: Fine Peacock Herl fibers
Crown: Lady Amherst tail fibers
Tentacles: Saddle Hackles - alternate colors
Rear Body: Ice dubbing
Rear Body Hackle: Schlappen
Sides: Fine Peacock Herl fibers
Tentacles: Saddle Hackles - alternate colors
Mid Body Wing: Marabou
Crown: Lady Amherst tail fibers
Front Body: Ice dubbing
Front Body Hackle: Saddle Hackle
Wing: Pheasant Rump hackles - Two staggered and stacked
Weight: Medium or Large barbell
Step 1
Before inserting the cotter pin into the vise or tube fly vise, hold it in your hand and attach the thread. Cover the shank with thead so the two sides of the cotter pin stay together. Select a 6" piece of 20# beading wire and attach it to the top of the cotter pin shank. Insert the butt ends through the eye of the hook then double them back and wrap thread over them. Apply your favorite glue to the shank at this point.
Note: The vice is making the beading wire stick up. It will extend straight out the back when the fly is done.
Step 2
Make a dubbing loop about 3" long and apply some tacky wax to the thread forming the loop.
Step 3
Insert some holographic ice dubbing into the loop making sure that the fibers are sticking out at right angles to the thread.
Step 4
Spin the dubbing loop and make sure to pick out the fibers as you go so they don't get bound together.
Step 5
Wrap the spun dubbing loop around the shank a few times. Make sure to fold the fibers back out of the way as you wrap. Tie off the dubbing loop and go back over the dubbing a little bit to make sure it is secure.
Step 6
Select a small clump of white Bucktail fibers. Seperate the longer fibers from the shorter fibers and save the longer fibers. Attach one clump of fibers to the top of the shank and another clump to the bottom of the shank. After making a few light wraps of thread, use your thumbnail to spread the fibers evenly around the shank.
Step 7
Cut off about 10 fibers from a bleached and dyed peacock stick....pre-dyed herls will work just fine as well. Attach one clump to the near side and one clump to the far side.
Step 8
Snip off about 6-10 fibers from a Lady Amherst tail feather and attach them to the top of the shank.
Step 9
Pick out two different colored saddle hackles. Tie one feather to the near side angled down below the hook. Take a different color saddle hackle and tie it to the far side of the shank angling down as well.
Step 10
Trim off all of the excess material and make sure everything is bound tightly to the hook.
Step 11
Tie in a schlappen feather by butt of the stem, then spin some ice dubbing onto your thread. Wrap the dubbing forward to about the midpoint of the hook and stop.
Step 11Palmer the Schlappen hackle forward and tie off where the dubbing ends.
Step 12
Trim off the schlappen fibers on top of the hook shank.
Step 13
Cut off about 10 fibers from a bleached and dyed peacock stick....pre-dyed herls will work just fine as well. Attach one clump to the near side and one clump to the far side. The tips should not extend to the rear of the fly. Keep them about two inches short of the longest fibers.
Step 14
Top View
Step 15
Using the same two differently colored saddle hackles, the the opposite color on the near side.....different than the one you tied in previously. Again, tie one feather to the near side angled down below the hook. Take a different color saddle hackle and tie it to the far side of the shank angling down as well. Keep the length about an inch shorter than the previous saddle hackles.
Step 16
Top View
Step 17
Take a marabou blood plume and strip off the lower fluff so the top 1/2 to 3/4 remain on the stem. Tie the plume flat on top of the shank with the tips extending about an 1" past the butt end of the cotter pin. Take a few Lady Amherst fibers and tie them directly on top of the marabou plume. Let the tips extend slightly past the tips of marabou.
Step 18
Top view
Step 19
Spin some ice dubbing onto the thread and wrap forward to form the front half of the body.
Step 20
Palmer the hackle forward and tie off. Trim off all of the hackle on top of the shank.
Step 21
Take two Pheasant Rump Feathers and stagger them on top of each other. Tie them to the top of the shank so they sit flat over the body and extend just shy of the marabou wing.
Step 22
Finish the fly by adding 1 medium or 1 large barbell with figure 8 wraps and gathering wraps to mount them securely. Coat the head with head cement or epoxy.
Wednesday, November 16, 2011
Saturday October 29, 2011
Decided to head below the Trestle for the AM session and to also check out the river from last year’s floods. Surprisingly, I had the whole flat to myself for most of the morning. A few trees/branches were down that I didn’t remember from last year, but they didn’t seem to be a problem for swinging some flies. The only problem was I forget to put a few skaters in my box!!
Started out just above the uppermost tree that was in the water and began working downstream. I had only been in the water for about 30 minutes, looked upstream and saw an empty plastic soda bottle floating downstream. I focused on my cast and began the next swing when I heard I nice boil, just upstream of me. I look towards the noise and see the plastic soda bottle bobbing up and down inside the rings of the boil. Nah it couldn’t have been, did it really come up and hit the bottle? I’ll never know but the timing was awfully coincidental if it rose to something else.
I worked down the run and couple of other fly anglers did the “elephant walk” into the run below me so they could fish a grand total of 15 minutes before heading elsewhere. Oh well, at least they gave me a little room to step down and swing. A few more fish boiled here and there and I really wished I had my skaters. On to the next run. Isn’t that a Jay-Z lyric?
Hit the choppy water and decided to put on a purple conehead Swarn-a-Bugger with a pink egg bead in front of the fly but not pegged. I also had on a 3.9 ips poly leader with 12lb fluoro for the tippet. Started working down through toward the next bend and a guy came down the trail and spotted some salmon near the bank. Tuna stick in hand….ah you know what’s next. Anyway, he starts waving to me and giving me signals about the number of kings he sees moving up, then he does it again a little while later. I was casting to the far bank and he was barely in the water because the kings were so close, so I kept working down.
About the time I was almost down to him and ready to ask if I could keep working downstream in front of him, the concoction was on the dangle and bam!! A hot little steelhead starts thrashing around and makes a nice run. I played him out mid stream and tailed him so I could get the fly out, but he flopped away. I lead him to shore and the guy was nice enough to take a quick pick even though it was a skipper. He was real nice and we chatted for a bit about the river, I bummed a smoke from him, then he took off to get his brother to bring him back to the spot where he was trying to snag salmon. I fished a little longer then headed out for lunch.
After lunch I went to the 2A bridge area to fish and to wait for my buddy Paul to get done with his guide trip. My friend Jessica was there, so we fished a run together and took some pictures of each other tossing out some line. Jessica left since she had been there for a while, so I decided to stay and keep fishing until Paul arrived.
I went up to the Compactor and it was empty so I hopped in at the top and started doing the steelhead waltz. I decided to try fishing a bit deeper and switched to a 6.1 ips polyleader and put on a copper Irish Crayfish…..basically a poor man’s General Practitioner.
Nothing happened through the top end of the pool, but I was eager to get to the slick tailout. I got one quick tug that pulled some line out of the reel, but no hook up. I kept fishing my way down the tailout and I was almost to the end and WHAM!! The line was ripped out of my hands and the rod starts bucking heavily. A nice chrome comes flying out of the water, then jumps again…..I try to get the line tight…..an awesome cartwheel…..reel reel reel….one last jump and it was gone…all in about 10-15 seconds. Man what a rush that was. I just stood there chuckling trying to replay it all in my head. Paul had floated by a little earlier so I headed downstream to meet up with him.
Paul and I went to Pineville to share a run and fish the evening session. Paul hopped in the riffs so I decided to start in the tailout since no one was around. We fished hard for about an hour and a half but didn’t have any solid tugs. Paul had one pluck at the fly and not long after he had a tug while stripping in line for the next cast. Neither one got hooked though. I only had one half hearted tug, but it was a great time sharing water with a good friend. We left at dark while the few kings that were around started doing there thing.
Subscribe to:
Posts (Atom)